A concise explanation can be found on a discussion board at a British site called The Naked Scientists. Explains everything except the black flakes. Have to keep working on that bit.
Wednesday, October 31, 2007
More on the electrolysis of salt water
A concise explanation can be found on a discussion board at a British site called The Naked Scientists. Explains everything except the black flakes. Have to keep working on that bit.
Tuesday, October 30, 2007
Tiny Bubbles

Lesson: Splitting molecules
What Happened: Hydrogen and oxygen bubbled off of electrified wires
What am I doing with the match? Trying to make hydrogen pop.
We had a few free minutes this morning, and it wasn't too cold outside. So I thought we'd try a quick experiment that Theodore Gray describes which uses a 9V battery to separate water into its component hydrogen and oxygen atoms. Anthony set this up, and John took the photos.

Attach two conducting wires (we used uninsulated copper) and two metal rods (copper brads from a science kit we had lying around) to the battery. Place in a cup of water so that they don't touch. H will form on one lead and oxygen on the other.
We did get a ton of bubbles, especially after adding the recommended tablespoon of salt to the water.
Gray then goes on to suggest using a match to test which is which. The hydrogen, which is explosive, should pop or crackle. The effect, if present, was very subtle. We also added dish detergent, which from the description we thought would make soap bubbles float into the air. The glass developed a nice head of foam after a few minutes, but no bubbles of hydrogen sailed away.
 The salt, Gray said, would produce chlorine gas, which would smell vaguely like a swimming pool. There was definitely a smell, but not recognizably chlorine. (Of course, we were outside, taking advantage of the good ventilation.) The water did attain a nice blue shade, which in retrospect I think may have been from the oxidation of the copper brad. And the hydrogen terminal turned a tarnished green fairly quickly.
Finally, at the end we were left with a flaky black precipitate at the bottom of the glass. I'm thinking sodium, from the break-up of the salt. Gray doesn't mention it; I'll have to check that out.
Here is an interesting note he adds about the experiment:
This is also the only simple experiment you can do in which, in a very real sense, you create the atoms you're collecting, rather than just separating and purifying them. Think about what a hydrogen atom is: It's nothing more than a single proton, captured in a cloud of negative charge from the electrons surrounding whatever compound it's part of. When you use electricity to split water, you send an electron from the battery down into the water, where it finds a water molecule, rips off a proton, and the proton and electron combine to form a hydrogen atom. (Technically, two electrons rip off two protons and form a molecule containing two hydrogen atoms, but that's a detail.) The point is that by adding electrons to water, you are creating hydrogen atoms out of two subatomic particles. In virtually every other chemical reaction the atoms already have lots of electrons around them, and you're just making changes around the edges. But here you're making the atoms up pretty much from scratch, no accelerator or nuclear reactor required, just a 9V battery.Now, according to a NASA website, Gray's explanation is not quite accurate:
Electrolysis of an aqueous solution of table salt (NaCl, or sodium chloride) produces aqueous sodium hydroxide and chlorine, although usually only in minute amounts. NaCl(aq) can be reliably electrolysed to produce hydrogen. Hydrogen gas will be seen to bubble up at the cathode, and chlorine gas will bubble at the anode. ... Oxygen is not given off in this experiment. That's because the oxygen atoms from the water combine in the liquid with the salt to form hydroxyl ions. Salt's chemical formula is NaCl - sodium chloride. The chorine gas is from the chloride in the salt. The oxygen in the hydroxyl ions stay in the solution. So what is released in this reaction is not oxygen but is chlorine gas that collects around the electrode tip.Demonstrating yet again the danger of trying to teach a subject I don't quite understand. I will have to look into this a little further.
Friday, October 26, 2007
Explosions

Ken Denmead of Wired Magazine's Geekdad blog has posted a link to Home Chemistry this morning that mentions a thermite explosion. Theo Gray, he of the lovely Periodic Table, suggests trying some liquid nitrogen ice cream.
My list of goals for our Home Chemistry project, so far, does include freezing stuff and perhaps a small explosion. (I also want to try growing some crystals.) But nothing that risks life, limb, or the kitchen table.
So I'm taking suggestions. What freezing, exploding, or other experiments should we try -- or NOT try?
Thursday, October 25, 2007
Water Witch
Lesson: Electron transfer
What Happened: A negatively-charged plastic spoon attracted polar molecules of water
Chapter 1 in The Joy of Chemistry is "Electrons and Atoms, Elephants and Fleas" (a good picture to help you remember the relative size of an electron compared to an atom's nucleus). The boys rubbed plastic spoons on their hair and then held them next to a tiny stream of water. The stream bent toward the spoons, very slightly. We tried the demonstration again later in the week, when the weather was damp, because I read elsewhere that it would work better when there was some humidity in the air. (I can't find the site now, but rubbing the spoon on nylon was supposed to create an opposite charge, so that you would be able to get the two spoons to attract each other; didn't work, though.)

After the demonstration, I read most of the first chapter out loud. I'm finding myself trying to throw in extra information from later chapters, which just gets confusing, so I'm going to try to restrain myself. I think going through the book, in order, will give the kids a good idea of the basic ideas.
At the same time, I'm hoping the demonstrations we try out in the course of this project, both from the book and the "enhanced" versions I can't resist digging up online, aren't as underwhelming as this one. It's discouraging when something doesn't work at all, and of course the kids just find it dull. It can be hard to get things right the first time, though, so maybe finding photos and/or videos will be helpful in finding the demonstrations most likely to succeed.

What Happened: A negatively-charged plastic spoon attracted polar molecules of water
Chapter 1 in The Joy of Chemistry

After the demonstration, I read most of the first chapter out loud. I'm finding myself trying to throw in extra information from later chapters, which just gets confusing, so I'm going to try to restrain myself. I think going through the book, in order, will give the kids a good idea of the basic ideas.
At the same time, I'm hoping the demonstrations we try out in the course of this project, both from the book and the "enhanced" versions I can't resist digging up online, aren't as underwhelming as this one. It's discouraging when something doesn't work at all, and of course the kids just find it dull. It can be hard to get things right the first time, though, so maybe finding photos and/or videos will be helpful in finding the demonstrations most likely to succeed.
Tuesday, October 23, 2007
Dry Ice is Cool


- Take an empty soda can.
- Fill it with water and heat.
- Quickly submerge it in icy water -- dry icy water, if available.
- Watch as can instantaneously collapses.
Across the hall, Sienna College students had a couple of neat demonstrations going on. A mysterious-looking contraption dripped bubbles filled with mist that burst spectacularly upon hitting the ground. Inside, we were told, was just a bowl of dry ice and some soapy water.

Next to them, were mixing cream, sugar and flavoring in sandwich bags and placing them on a block of dry ice. Within seconds the frozen treat would congeal, ready to be served with sprinkles.
Some trivia: Did you know that former British Prime Minister Margaret Thatcher was a research chemist who helped develop the first soft ice cream?
Monday, October 22, 2007
Good Chemistry

My Times Union story can be read today at www.timesunion.com. The editor added some nice experiments and "fun facts."
UPDATE: Here's the story, which is now available here:
Good CHEMISTRY
Finding the right formula for budding scientists a challenge
KATHY CECERI SPECIAL TO THE TIMES UNIO
Section: Life-Discovery, Page: C1Date: Monday, October 22, 2007
Anthony, my 11-year-old, had already made
oobleck from corn starch and water, leaving dried traces of the
quicksandlike mixture on the back deck. Now the boys helped me carry
window cleaner, lemons and other kitchen things out to the small table
on the lawn. One by one, we added bits of each substance to cups of
purple cabbage juice, watching each cup turn a different shade, from
turquoise to pink. John, the 14-year-old, was impressed that we didn't
even need any ``proper chemicals.''
Afterward, we arranged the solutions according to their acidity or alkalinity, then turned some pink vinegar back to purple - and blew up a balloon on top of the bottle - by adding baking soda to the vinegar. Physical change versus chemical reaction: our first official chemistry lesson at home.
 As a homeschooling mom and the hands-on learning columnist for Home
Education Magazine, I'm used to doing all sorts of projects with my kids
at the dining room table. But when it comes to chemistry, my head
starts to spin. Unlike the "6 out of every 6.0225 Americans" who
insist they flunked high school chemistry (according to science writer
Natalie Angier's book "The Canon"), I passed my tests, but was left with
sour memories of balancing equations and experiments that just wouldn't
work.
As a homeschooling mom and the hands-on learning columnist for Home
Education Magazine, I'm used to doing all sorts of projects with my kids
at the dining room table. But when it comes to chemistry, my head
starts to spin. Unlike the "6 out of every 6.0225 Americans" who
insist they flunked high school chemistry (according to science writer
Natalie Angier's book "The Canon"), I passed my tests, but was left with
sour memories of balancing equations and experiments that just wouldn't
work.
So I was intrigued to read Oliver Sacks' 2001 memoir "Uncle Tungsten," about the famous neurologist's early fascination with chemistry. Young Sacks loved to test samples obtained from his Uncle Dave, a manufacturer of light bulb filaments, in an unused back laundry room of his house - handy for flinging out-of-control reactions into the yard.
I decided I wanted my kids to discover a little of that fun, too (within reason). What I learned, however, is that doing chemistry at home is a lot harder than it used to be.
Afterward, we arranged the solutions according to their acidity or alkalinity, then turned some pink vinegar back to purple - and blew up a balloon on top of the bottle - by adding baking soda to the vinegar. Physical change versus chemical reaction: our first official chemistry lesson at home.
So I was intrigued to read Oliver Sacks' 2001 memoir "Uncle Tungsten," about the famous neurologist's early fascination with chemistry. Young Sacks loved to test samples obtained from his Uncle Dave, a manufacturer of light bulb filaments, in an unused back laundry room of his house - handy for flinging out-of-control reactions into the yard.
I decided I wanted my kids to discover a little of that fun, too (within reason). What I learned, however, is that doing chemistry at home is a lot harder than it used to be.
Saturday, October 20, 2007
Uncle Tungsten
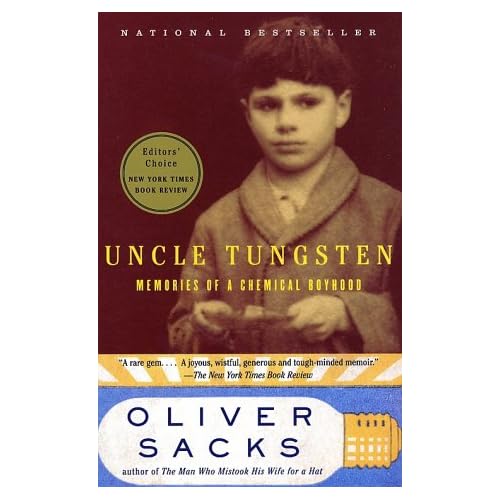
I am in the middle of re-reading Uncle Tungsten
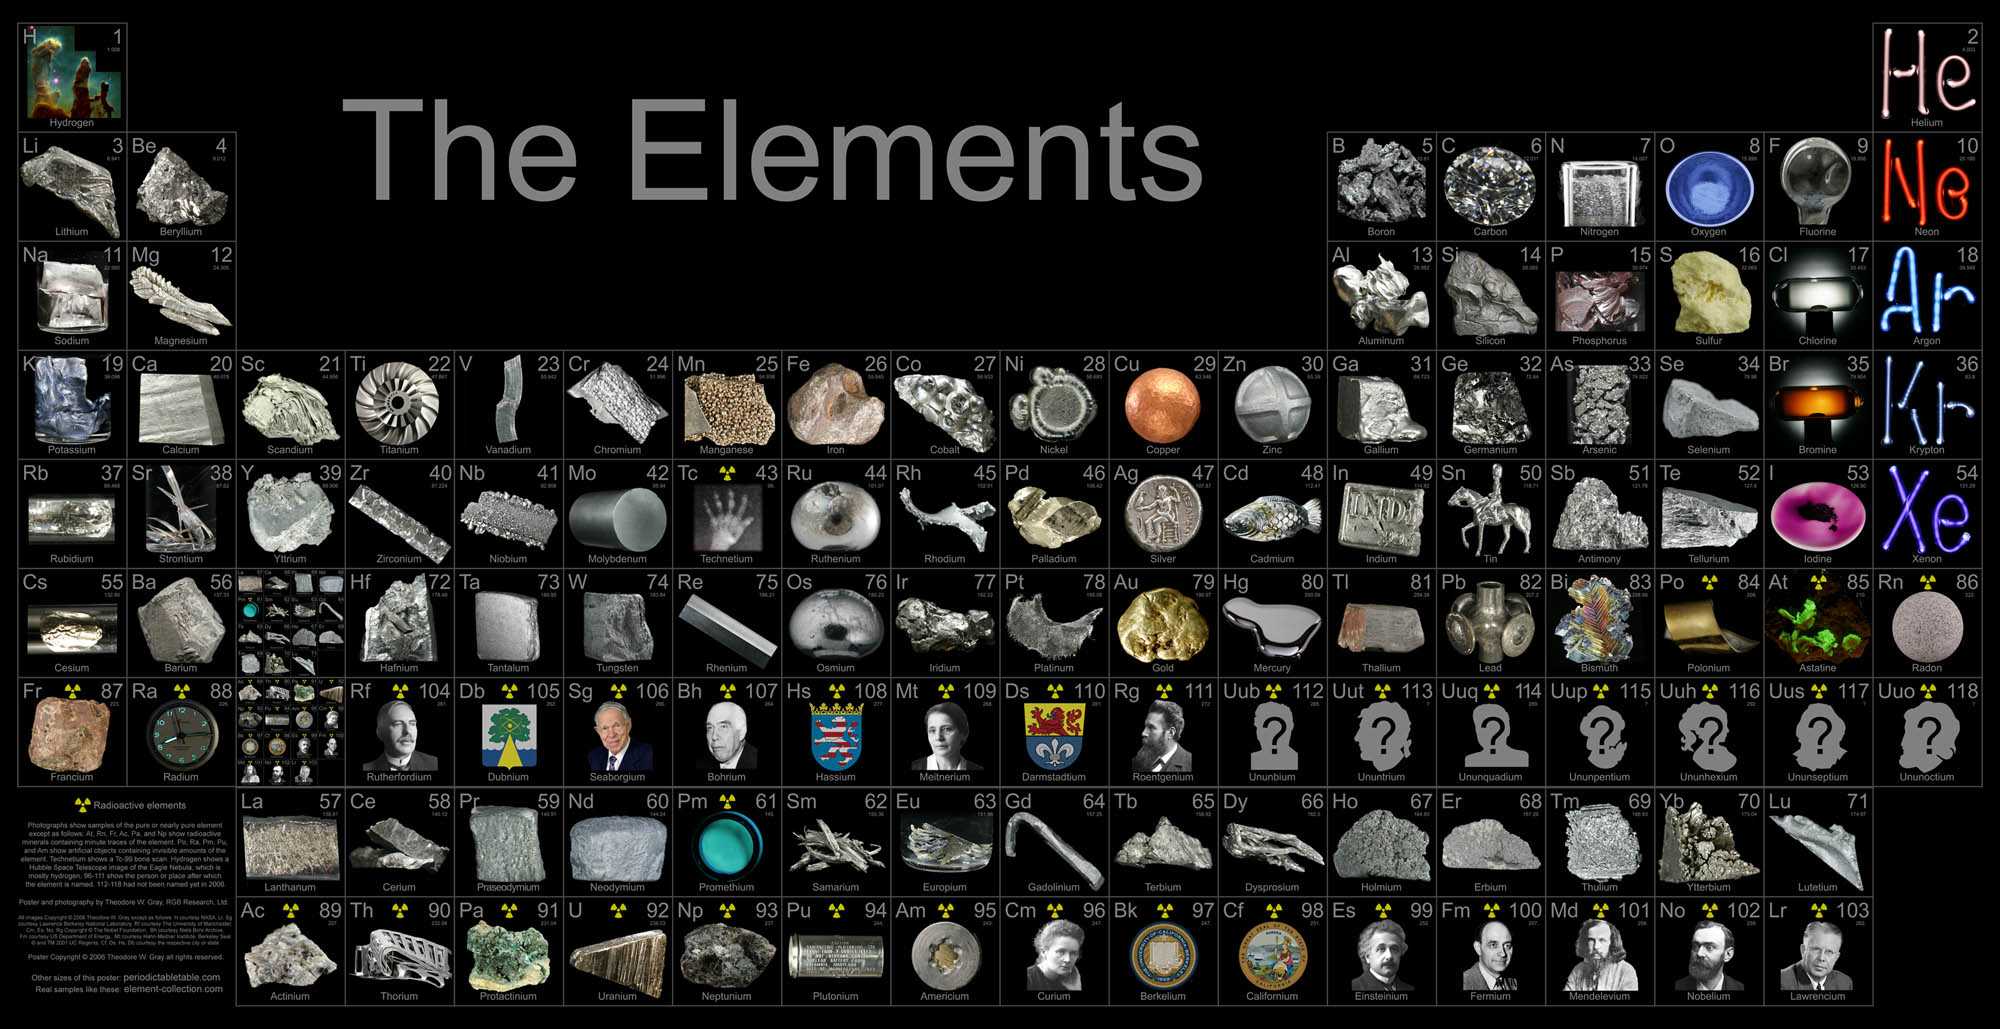
Oliver didn't just play around with chemicals and reactions; he also read extensively, working his way through texts and memoirs of the great discoverers of the elements. (His goal in life at that point, he says, was to grow up to be an eighteenth-century chemist). A periodic table at a nearby museum, containing actual samples of the elements, became an object of fascination for him. (The book inspired Theodore W. Gray to construct his own Wooden Periodic Table Table -seen below entertaining Sacks in his office - and to create this beautiful poster.)

This was the book that gave me the notion that studying chemistry might be fun. Reading it the first time, I paid more attention to Sacks' personal trials (including being sent to a sadistic country boarding school during the Blitz), and the insights I got into the wonder of chemistry came strictly through the author's descriptions of his feelings. This time, having gotten hold of some of the concepts involved for perhaps the first time, I'm appreciating just how much knowledge Sacks was able to absorb at such a young age through his reading, experimentation, and what he liked to think of as his "apprenticeship" to the scientists in the family.
I think Uncle Tungsten holds a special place in the hearts of many chemists. I know it does in mine.
Friday, October 19, 2007
Diet Coke + Mentos
It has been brought to my attention that there are people who have never seen the chemical reaction that results from dropping Mentos candy into a bottle of Diet Coke. You can now buy something called a "Geyser Tube" to release the Mentos from Steve Spangler, who had the first video of the phenomena on his kids' science website/online store. Here is his explanation of what's happening, which (he notes) some scientists think is a physical and not chemical change:
Water molecules strongly attract each other, linking together to form a tight mesh around each bubble of carbon dioxide gas in the soda. In order to form a new bubble, or even to expand a bubble that has already formed, water molecules must push away from each other. It takes extra energy to break this "surface tension." In other words, water "resists" the expansion of bubbles in the soda.
When you drop the Mentos into the soda, the gelatin and gum arabic from the dissolving candy break the surface tension. This disrupts the water mesh, so that it takes less work to expand and form new bubbles. Each Mentos candy has thousands of tiny pits all over the surface. These tiny pits are called nucleation sites - perfect places for carbon dioxide bubbles to form. As soon as the Mentos hit the soda, bubbles form all over the surface of the candy.
Couple this with the fact that the Mentos candies are heavy and sink to the bottom of the bottle and you've got a double-whammy. When all this gas is released, it literally pushes all of the liquid up and out of the bottle in an incredible soda blast. You can see a similar effect when cooking potatoes or pasta are lowered into a pot of boiling water. The water will sometimes boil over because organic materials that leach out of the cooking potatoes or pasta disrupt the tight mesh of water molecules at the surface of the water, making it easier for bubbles and foam to form.
Last time I looked, there were 15 thousand videos on YouTube showing Diet Coke and Mentos, including quite a few purporting to show what happens when you put the candy in your mouth and then take a swig of soda. The one above, of soda geysers choreographed to music, is currently the top-rated -- and my favorite too.
Thursday, October 18, 2007
Chemistry Sets, part II
This Wired Magazine piece about hands-on chemistry was the inspiration for my Times Union story. I later found this companion video from the PBS show Wired Science, which really shows what used to be, and where things stand now in the world of chemistry sets and high school science labs. (I haven't checked out the other Wired Science videos available online, but they look interesting...)
Wednesday, October 17, 2007
Upcoming Albany Times Union story

We had a photo shoot at the house Sunday. I hope you can't see all the dust. I'm looking forward to seeing my "package" (feature and sidebars) on Monday's Discovery page.
I'm also hoping to make it to the National Chemistry Week event at the New York State Museum on October 21. Colleges and businesses from around the area offer hands-on activities for kids. Sounds like fun!

Tuesday, October 16, 2007
Skilcraft ChemLab 1100


We opened our first chemistry set last weekend. I don't how long we've owned this thing, or even where we got it (probably the grandparents). But I knew we hadn't had much luck with inexpensive science apparatus before (the Toys R Us microscope and telescope, for instance) and besides ... it looked intimidating.
Now that I'm getting used to the idea of working with chemicals, however -- and especially because The Joy of Chemistry suggested raiding your kids' chemistry sets for hard-to-find ingredients -- I decided to set aside an afternoon last weekend and give it a try.
Having done a fair bit of research into the pitiful state of chemistry sets today (more on that in future posts), I have to say I was pleasantly surprised. Yes, the punch-out plastic scale looks useless, there's no key telling you what some of other items are supposed to be, and the
 instruction booklet has been reprinted so many times it's barely legible. But sure enough, the kit contained at least one chemical I've been searching for (sodium carbonate, sometimes used in place of lye to make pretzels crispy), and a few others that look handy. The booklet, if it can be trusted, contains some neat-sounding experiments. And I thought it couldn't hurt to try out the equipment as the book suggested, practicing placing drops of uniform size on a plastic-covered sheet of graph paper with the enclosed disposible pipettes. (No glassware, of course; not only because of the danger to kids, but probably also because anti-meth laws have made test tubes and Erlenmeyer flasks illegal.)
Having looked it over, I told the kids they could use the chemistry set on their own, with my supervision. Not today of course. But soon.
UPDATE: If you're looking for directions for the Skilcraft ChemLab 1100, contact Nancy Kopec at Chartpak, the company which manufactures the kits. Her email is: nkopec@chartpak.com.
Saturday, October 13, 2007
Fall Colors


Lesson: Analyze organic compounds using solution chromatography
What Happened: Pigments released in acetone solvent were drawn up into paper towel at differing rates
Here is another demonstration we tried this week from The Joy of Chemistry
We used maple and oak leaves from our yard. In two different glass jars, the kids crushed and tore up the leaves, then covered them with acetone (fingernail polish remover from CVS). They then taped strips of paper towel to pencils and let them dangle into the solution, where the various pigments in the leaves were supposed to be drawn up via capillary action, creating different-colored stripes.
According to the book you only need to leave the solutions for a few hours. We left ours overnight. I was a little disappointed that we didn't see the bright red of the actual leaves, but you can make out some bands of brownish red and some yellow along with the bright green.


Friday, October 12, 2007
Regents Exam Prep

Here in New York State, public high school students take state-wide exams known as Regents. I was a good test taker in school and scored in the 90s on every Regents exam except French (for reasons I won't go into on this blog). The point is, at some moment in my life I knew enough chemistry to score a 90 on a standardized test. And then promptly forgot it.
Last week, in preparation for an upcoming story on homeschooling chemistry for the Albany Times Union, I read through our "text" for the year, The Joy of Chemistry (see below). And I once again had that all-too-rare feeling of understanding something kind of complicated. In fact, I kept joking that if I had to take the Chemistry Regents this week, I could probably pass it.
Well, I just took an online quiz on atomic structure, redox reactions, and acids and bases at the Oswego City School District's Regents Exam review site. I didn't score 90 percent -- not even close -- but I got enough answers right to think that I'm starting to regain some of that long-lost knowledge. If you want to give it a try, the link is here.
Molecules That Matter at the Tang

Wednesday we went to the curator's tour of the new Molecules That Matter exhibit at Skidmore College's Tang Museum given by Ray Giguere, professor of organic chemistry, and Tang Director John Weber. The museum is dedicated to indisciplicinary exhibits (previous shows have involved astronomy -- including basketball-sized meteors -- sound, and other cool topics), and the chemistry-based show includes gigantic models of the ten most important organic (carbon-based) molecules of the past 10 decades, chosen with an eye towards attracting young adults to the field of chemistry.
The exhibit also includes ads, samples of products like plastics and nylon, and paintings and sculpture inspired by the molecules on display.

I have set up field trips to the Tang for our homeschool group since the museum first opened, and several of our friends were with us Wednesday. While some of it seemed to go over the head of the kids (who are between 11 and 16), I could tell the parents were interested, which counts too in my book. After the talk, Tang educator Ginger Ertz had the kids (and adults) make collages using bits of plastic, reminiscent of one of the artworks in the show.
Friday, October 5, 2007
At-Home Science Activities
Just wanted to put in a link to my latest Family Online column on at-home science in general. Mostly safe stuff for younger kids, but some scary sites included for those who like to live dangerously.
Tuesday, October 2, 2007
We Begin


Lesson: Chemical reaction versus physical change
What Happened: Baking soda + vinegar = water + CO2
Yesterday we did our first demonstration from the book I will be using as the “spine” of my curriculum: The Joy of Chemistry: The Amazing Science of Familiar Things by Cathy Cobb and Monty L. Fetterrolf .
It started off with two processes I knew I could handle: making red cabbage pH indicator, and mixing baking soda and vinegar. But since it brought up the subject of pH, I combined the book's demonstration with one I found on the About.com Chemistry section. First, I had the kids chop up half a red cabbage and put it in a large ziploc bag. Then I added an equal amount of water and put it in the microwave for a couple of minutes. Opening the ziploc top just a tiny bit made it possible to pour out the resulting bluish liquid without too much of the cabbage spilling out.
I then gathered together some of the stuff mentioned in the About.com article and took it all outside to the backyard. I filled several study clear plastic cups with pH indicator and let the kids try adding a little of each of the substances one by one: baking soda, vinegar, lemon juice, citric acid, cream of tartar, Sprite and some spray cleaner (I thought it contained ammonia, but later saw on the label that it did not). We ended up with a nice variety of shades ranging from pink to turquoise.
The book called for creating an "explosion" by corking a soda bottle filled with vinegar and cabbage juice. Instead of trying to find a cork that fit, I used a trick I saw Bill Nye the Science Guy demonstrate once on Mr. Rogers' Neighborhood. I took a balloon, had the kids put a couple of spoonfuls of baking soda into it using a funnel, and pull the end of it over the top of the soda bottle. Then at the appointed moment, one of them lifted the balloon and shook the contents into the bottle. The result was satisfying, if not dramatic.
Subscribe to:
Comments (Atom)